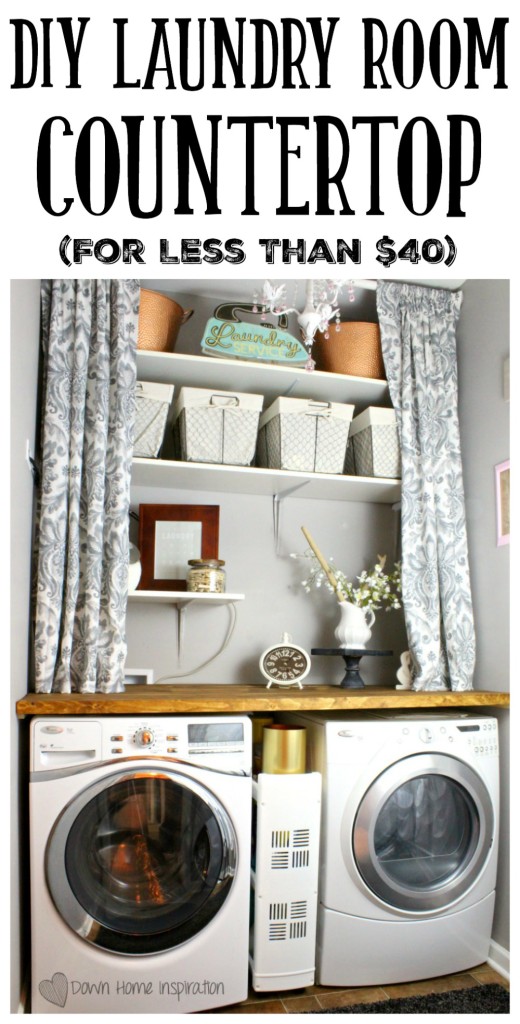
In case you’ve missed it, I have been redoing my laundry room for the past couple of weeks. To catch you up quickly, here is what it started out as, the lighting changes, some cute DIY laundry bags I made and the big reveal.
And as I mentioned in the reveal, a laundry room countertop was an integral piece of the design plan. I noticed that every laundry room photo that drew my eye had a gorgeous wood counter. It was time to create one of my own. Luckily for me it is a very simple project and relatively budget friendly, coming in under $40. Here is how I made mine:
Supplies:
(3) 6 foot 1x10s
(1) 6 foot 1×4
(1) 6 foot 1×2
(2) 8 foot 1×2
drywall anchors, screws, level, drill, stud finder
wood stain, polyurethane
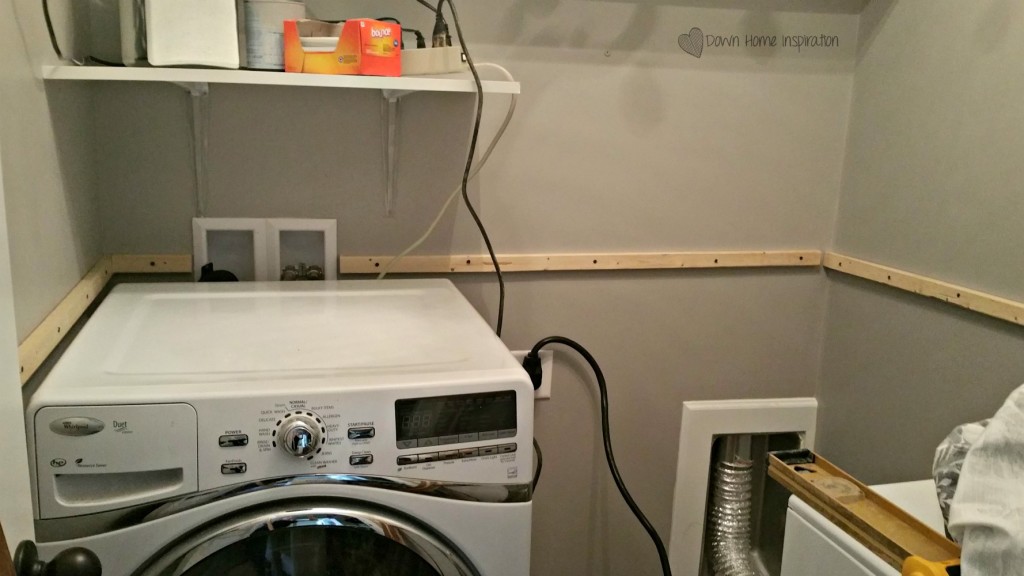
The first thing that I noticed when I got to work was that my washer and dryer are not the same height. In fact I had forgotten that they are no longer even a matching set. My washing machine died a couple of years ago and I chose to only replace the one piece. Most washers and dryers will have adjustable feet underneath them so that you can raise or lower as needed, but mine did not. So, measure the height of your set and add an inch or two. You do not want the counter sitting directly on top of them! The rattling noise would drive you insane!
You’ll also need to measure how deep the set is, or how far out from the wall that is sticks. Now just cut your (2) 8 foot 1x2s accordingly to act as the frame. So I had two pieces cut at 32″ (the depth of my set) and one longer piece cut at 55″ to go across the back. I also had one short piece to fill the small gap around my water valve.
Because I was doing this project alone, I don’t have any photos of the most of these steps, but I used my stud finder to locate any studs that I could screw into. Where there wasn’t a stud available, I used drywall anchors. The countertop isn’t that heavy, but when you start adding your laundry soap and decor on top, it adds up. You wouldn’t want it to rip out of your wall!
I used my level to insure that my frame was straight and screwed into the studs or the anchors. My frame consisted of a back and two sides and looked like this:
Next up was cutting my countertop boards to length and a quick dry fit.

Loving the look at that point, I hurriedly stained the boards (I used Minwax Bombay Mahogany) and applied a coat of matte polyurethane. After allowing ample time to dry, I was ready to get back to work.
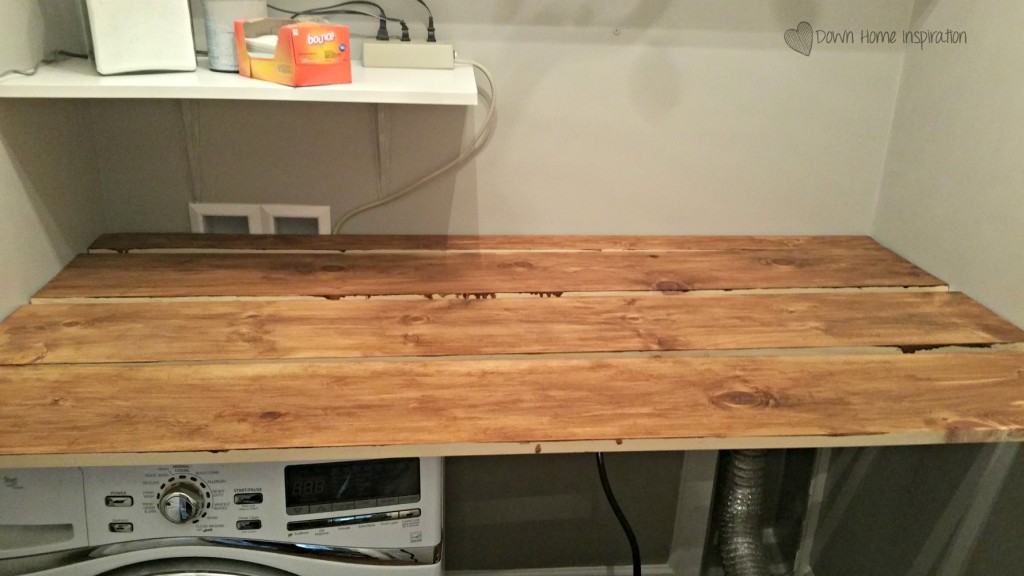
I chose to use 1x10s for my countertop for a couple of reasons. 1) Working by myself, I didn’t want to get plywood and pull out the table saw. 2) I love the look of planked wood. I ended up needing to use a 1×4 in the back to ensure that my countertop was long enough to cover my washer and dryer.
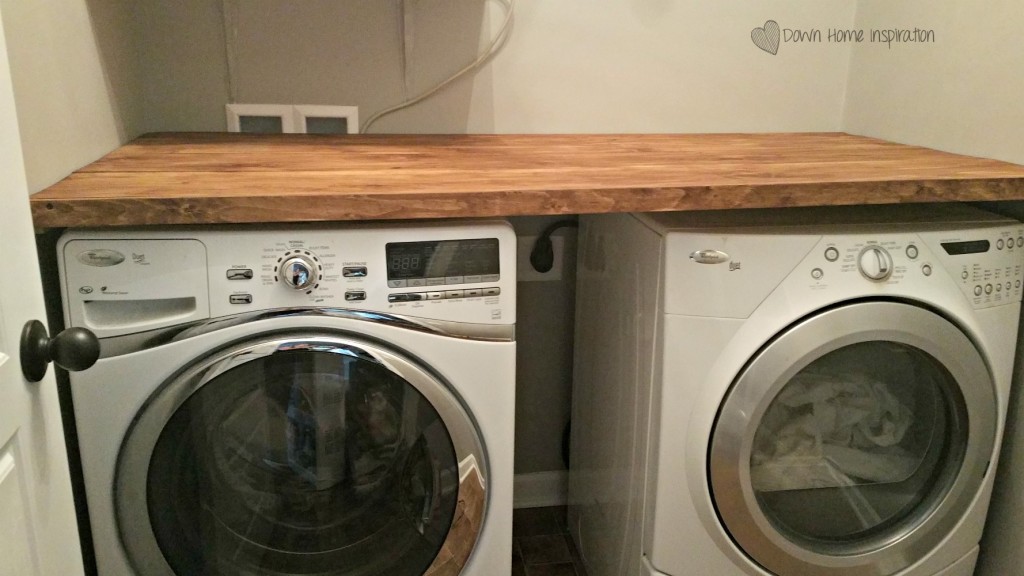
With the frame ready to go and the boards stained, I slid the boards into place and screwed them into the frame from the bottom. This would make it harder to remove them if I need to, but keeps the look clean from the top. I then added the 1×2 to the front, screwing it into both side frame pieces for added support.

With the tools and stain that I had on hand, my DIY laundry countertop cost me just $35. It added a homey feel to the room and gives me ample space to decorate, which I love!


Speak Your Mind