On a recent rainy day, I got annoyed with the layout of my living room and completely rearranged the furniture. I have an odd shaped room and it gives me fits every six months or so when I realize that I’m still not in love with the look that I have happening. After some huffing and puffing while pushing couches across the room and back, I realized that I was in need of some accent chairs of some kind. I shopped around online but didn’t find the look that connected with me. Until I went shopping on my favorite site…Craigslist! And I found these lovely hideous 70’s era cane back chairs. I ran to pick them up, threw them in the back of my van and the first thing I heard was my daughter telling me how ugly they were and that they were so smelly. After reassuring her that I had a vision, I got to work taking them apart as soon as we got home.
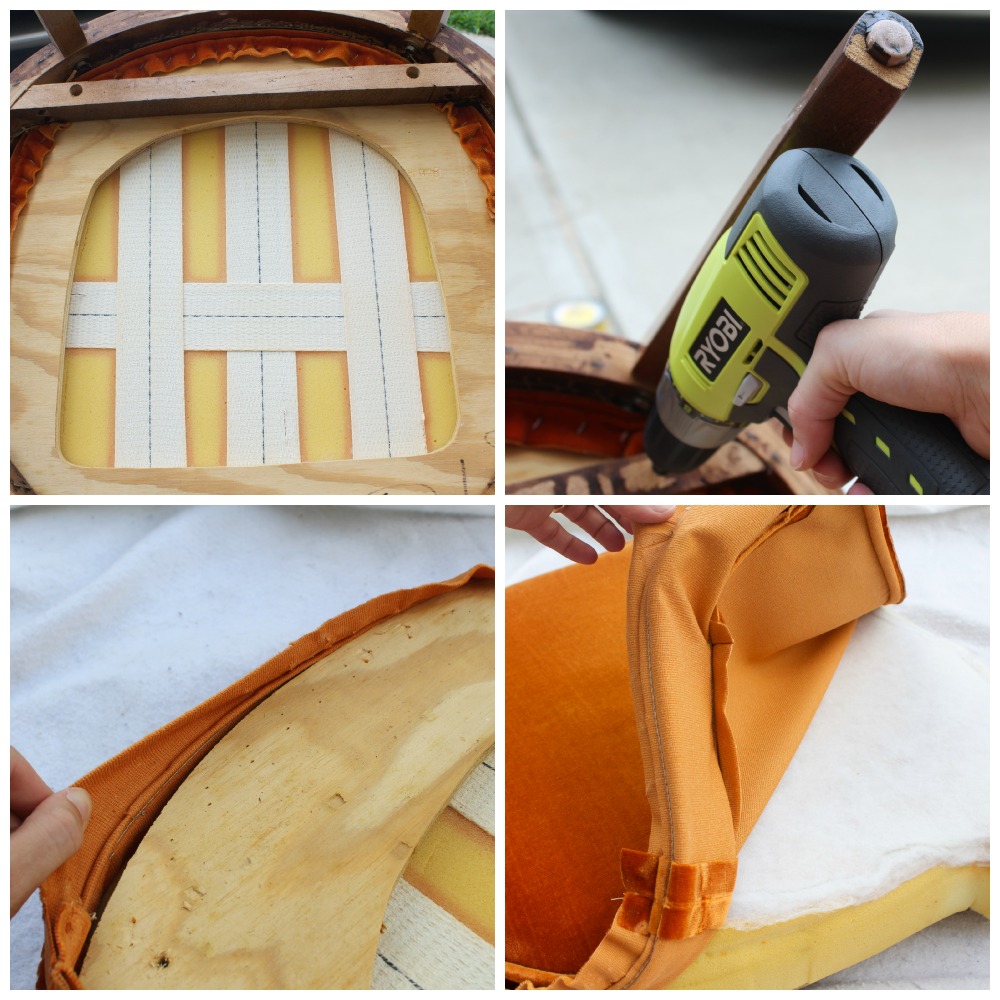
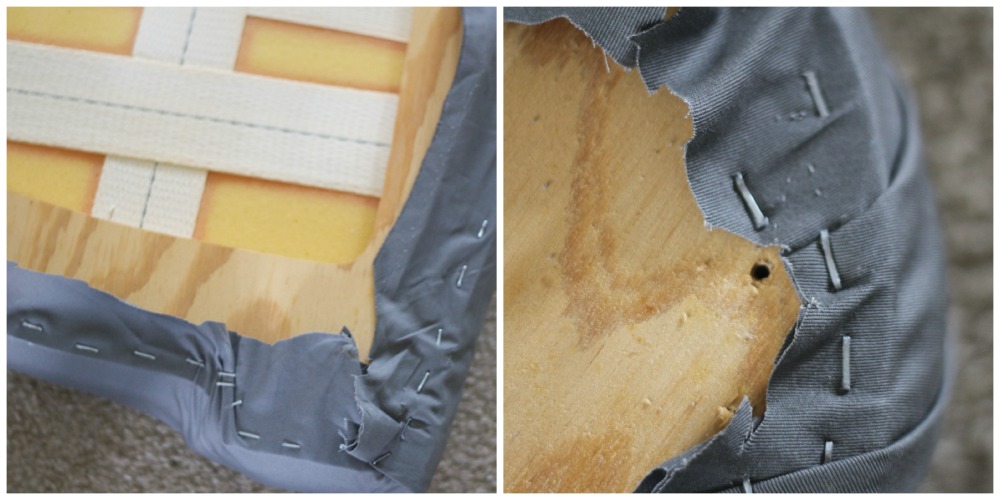
 Turning the chair over, I realized that there were just four screws holding the seat cushion on. My trusty Ryobi drill had those puppies out in a hot second. After removing the cushion, I used a flat tip screwdriver and a pair of pliers to remove all of the staples holding the fabric on. Once that was stripped down I set it aside to air out before I recovered it in more modern fabric than orange velvet!
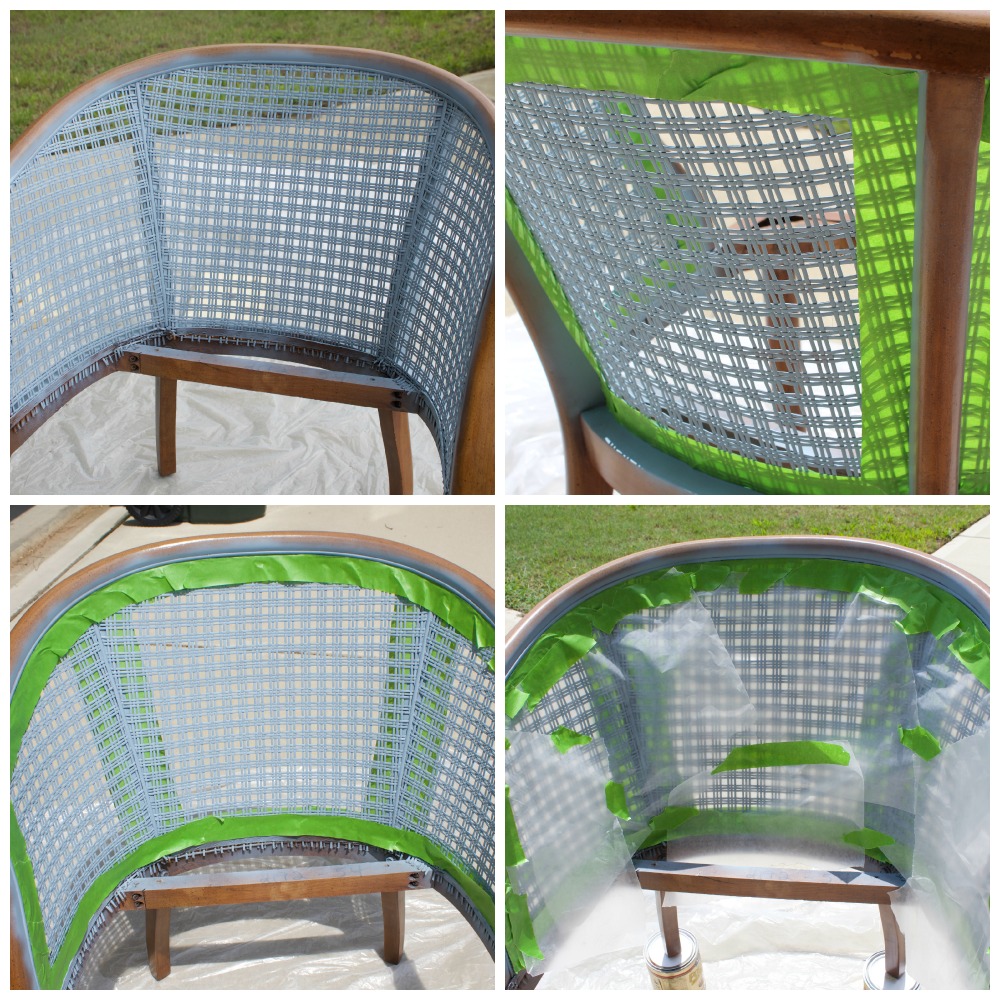
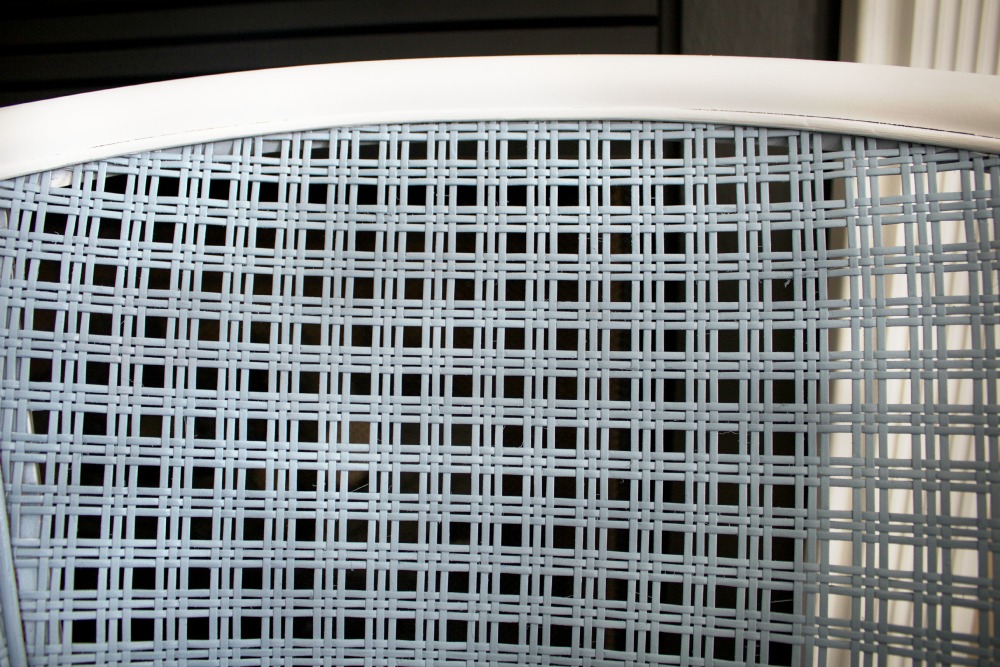
 Making sure to wipe down the chairs to remove the decades worth of dirt and grime, I was ready to paint. Spray paint made this project quick and easy. I knew that I wanted to have a dual colored chair, so I sprayed the cane first, not worrying too much about over spray. Once that dried I taped off the cane areas with painters tape and used wax paper to cover the large areas.
 It took three coats of cream spray paint to fully cover the wood grain. I made sure to let each coat dry fully before adding the next. Once it was completely dry, I added a clear coat to help with durability. There is no way that a piece of furniture can live in my home and not get covered in dirty, sticky handprints. It has to be able to withstand a scrubbing every now and then!
After giving the seat cushion it’s time to air out, I laid it onto the replacement fabric and cut around, leaving about three inches on all sides to pull up and staple. Pulling taut while stapling, I worked my way around the cushion. I’m not going to lie, this was not my forte. I’m not 100% in love with my reupholstery job. Granted, it’s definitely a gazillion times better than crushed orange velvet!
 Now that the chair was painted and reupholstered, all that was left was setting the seat back into the chair and retuning those four screws. Easy peasy.
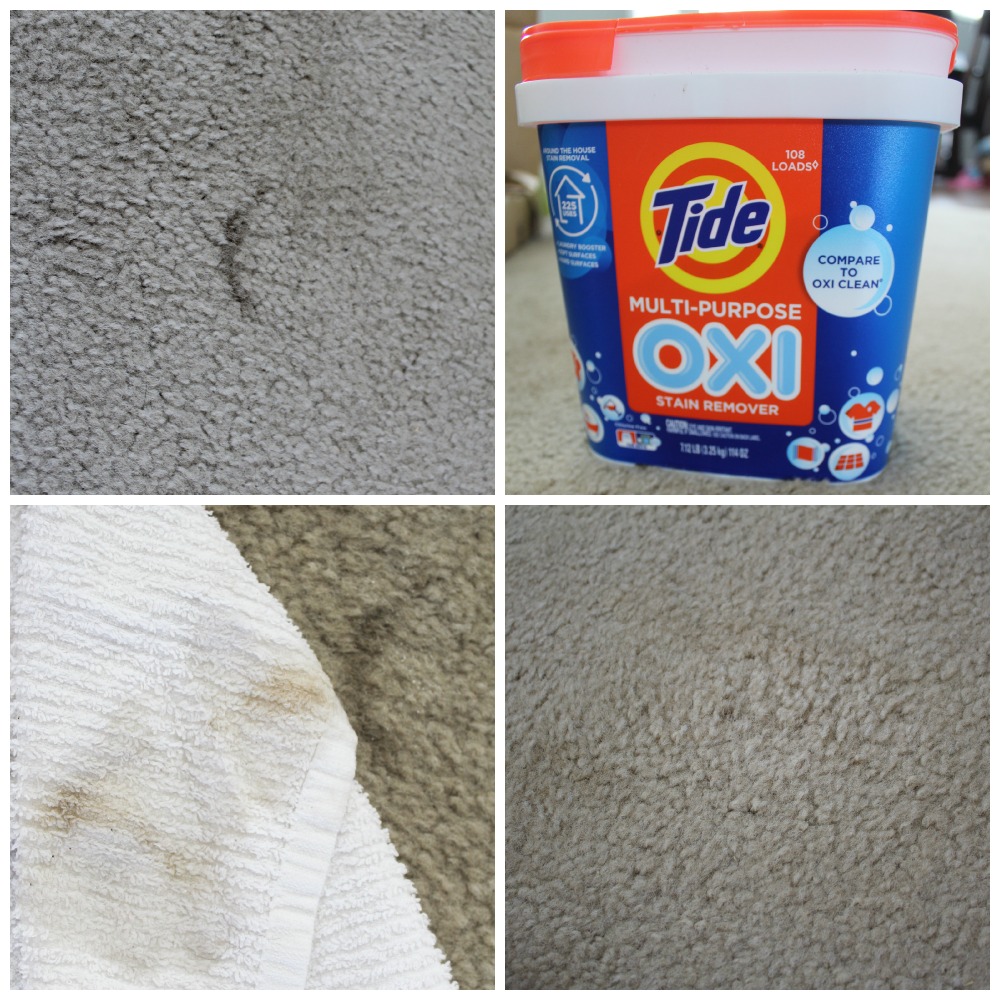
I was so super excited to place the chairs in my living room until I realized that there was a huge disgusting stain on my carpet in exactly the spot that I wanted the chairs in. It had been hidden under a love seat before the furniture moved, so it had clearly been there for quite some time and was set in. I figured that there was no hope, but I was still going to hold out for a carpet miracle. And I totally got it! It came in the form of one of my favorite cleaners from my laundry room. One that I had no idea that I could use for anything other than nasty kid’s clothes. It’s my Tide Oxi Multi Purpose Stain Remover. I guess the name should have given it away! Below are the un-edited photos from my carpet cleaning experience. It’s ridiculously amazing!
And now that the carpet is clean again I can adore my fun little chairs anytime that I walk through my living room.
 Love the dual colors!

A little elbow grease and $50 got me two chairs that add fun and personality to my room. Have you completed an upcylced project that you just love? Please share with us!

Thanks to Proctor and Gamble for supplying me with the miracle carpet cleaner. As always, opinions are 100% my own.


I love this-it looks sooooo good now!
Melissa@TheHappierHomemaker recently posted…How to Make a Distressed Painted Mason Jar
It looks beautiful and more classic after the transformation, such a great idea. Thank you for sharing this work of yours, it’s an inspiration.
Reema @ Uratex Hospital Mattress recently posted…Tips & Tricks on Child-Proofing your Living Room
Wow this is very creative and very eco-friendly, there should be more renovations to old chairs and mattresses like these all over the world to decrease deforestation, I will share this! thank you and keep up the good work!
Jessica recently posted…5 Factors That Made Uratex the Leading Foam Manufacturer in Southeast Asia
it’s definitely a gazillion times better than crushed orange velvet!
Haha, hard to believe that that was ever a “look,” right?!