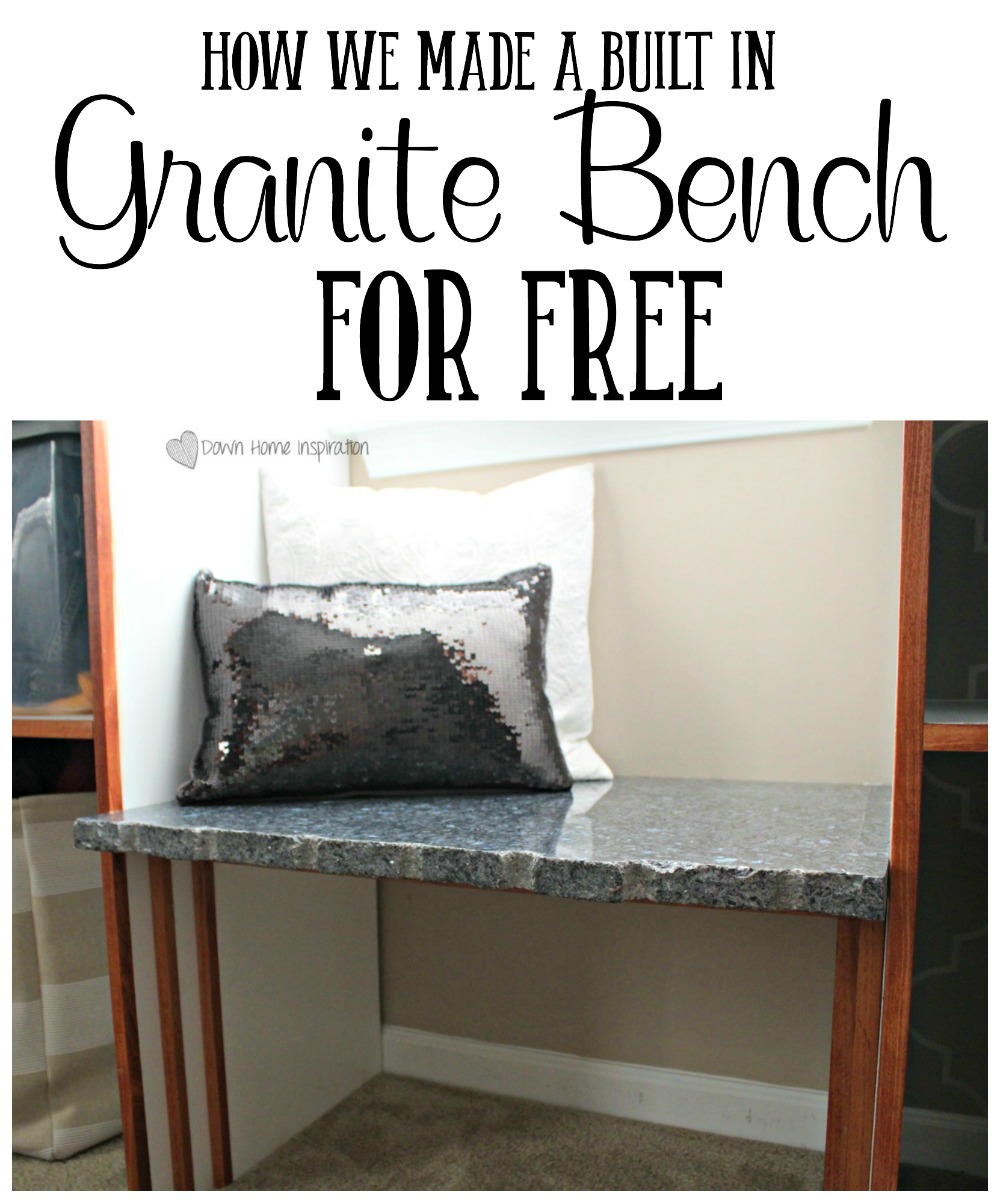
Hopefully you were just as enamored with my closet as I am and aren’t getting sick of hearing about it. But just in case you are, this will be my last post on the big dream closet makeover. In case you missed any of it, you can take a peek at the before photos and plan, the in progress shots, my Pottery Barn Jewelry Cloche knockoff and the big reveal. But for now I want to share with you how we made a built in granite bench for free!!!
In fact, in my Dream Closet Part 2 post I teased this bench just a tad. I showed you that we were able to snag a piece of granite for free and today I am going to give the full details on how we made a built in bench with it for a grand total of $0.00!!!
So here is our secret…we went to a local granite shop fully prepared to buy a small piece that would fit the built in bench that we were planning. When we spoke to a salesperson and told them that we needed a piece that was about 2’x2′ she said, “Oh, you guys should go check the junk pile first.”
Umm, excuse me? Junk granite?!?!
Apparently they throw out all of the small pieces that are excess from larger cuts. So we excitedly ran behind the shop and found this pile:
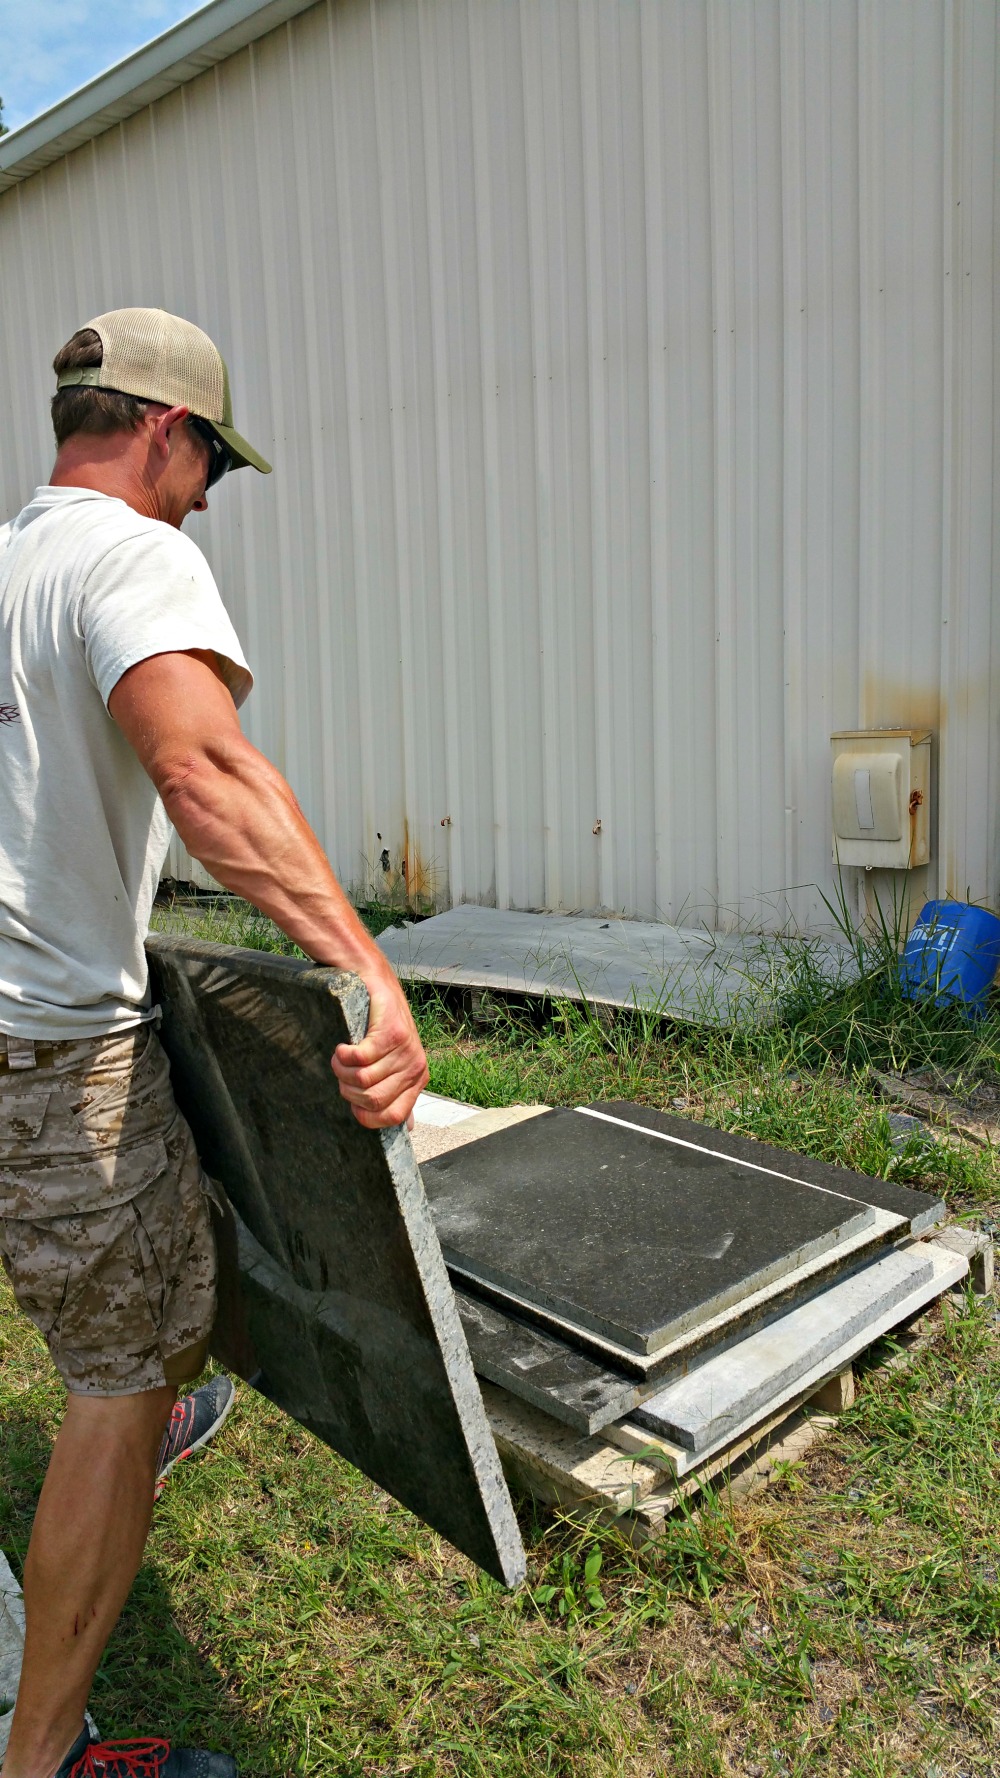
There were some odd shapes, some really scratched up pieces and there were even a couple of sink cutouts. But we continued digging through the pile (man, even those little pieces are heavy) and found a winner at the bottom!
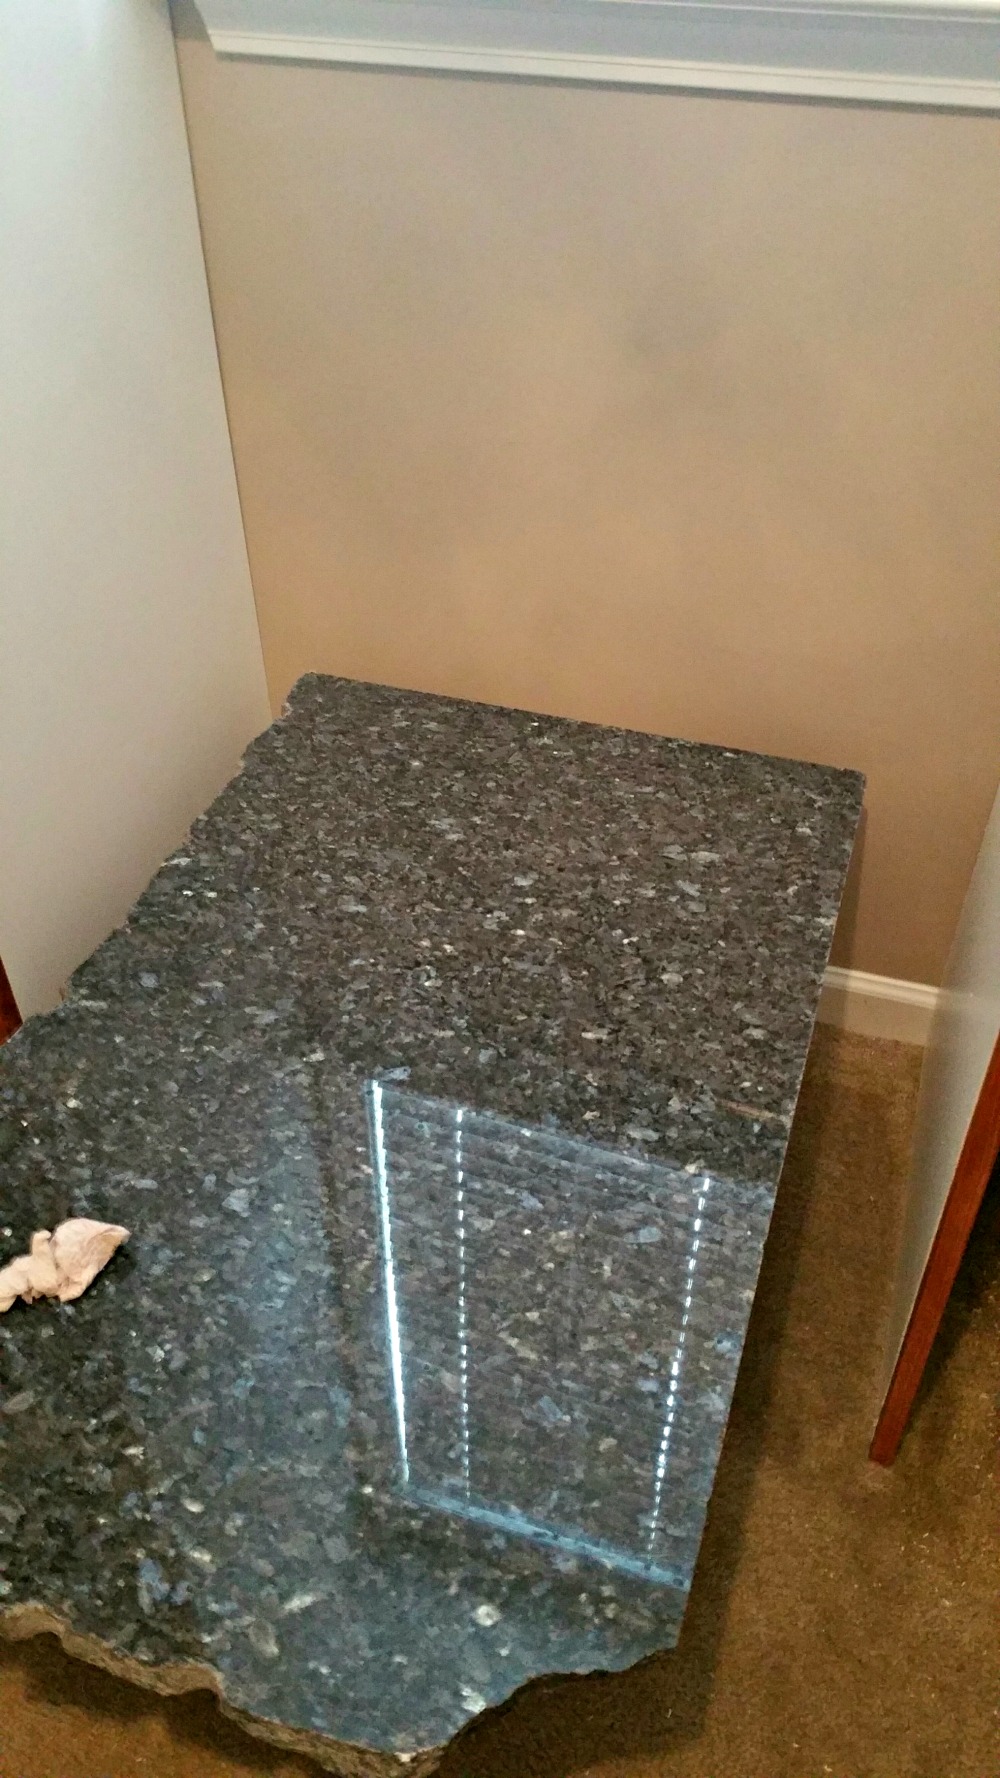
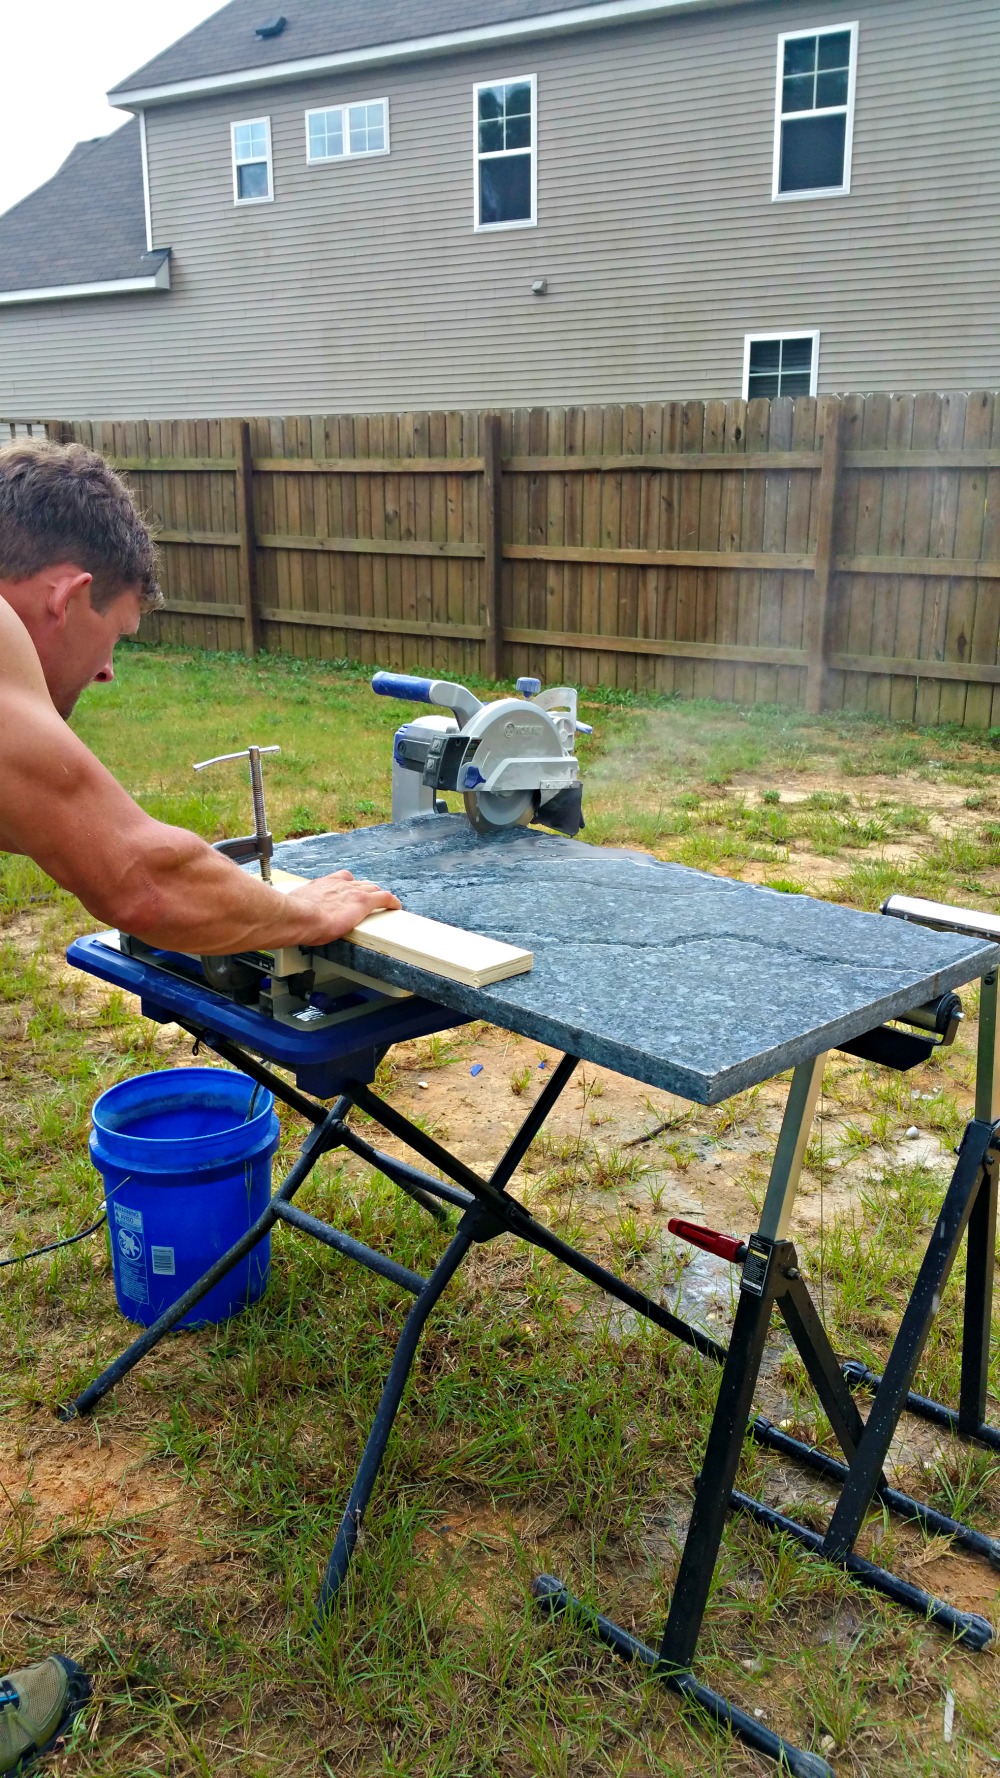
After setting it into the space for the bench, we heavily debated how we wanted to cut it. We spoke to the salesperson at the granite shop and were quoted $175 for two straight cuts…yikes! That would have cost more than if we bought the granite (the cuts were free when you purchase it). Back to the drawing board, we thought about renting a heavy duty tile saw. We had used one to cut our masonry blocks in our yard and it was $40 for a half day. Not bad, and if I am honest that is the way I was leaning, but my hubby was confident that our home tile saw could do the job.
And he was right! Mostly…
Because two sides were already cut and squared, we just needed to trim up one side and then the front (where it has a raw edge). We really liked the raw edge look, but weren’t sure that it was what we wanted for the space. Turns out, the granite slab would not fit on the tile saw in that direction, so the decision was made for us…the raw edge was staying!
It took multiple passes with our tile saw, but it ended up making a beautiful cut that looked completely professional. Score!
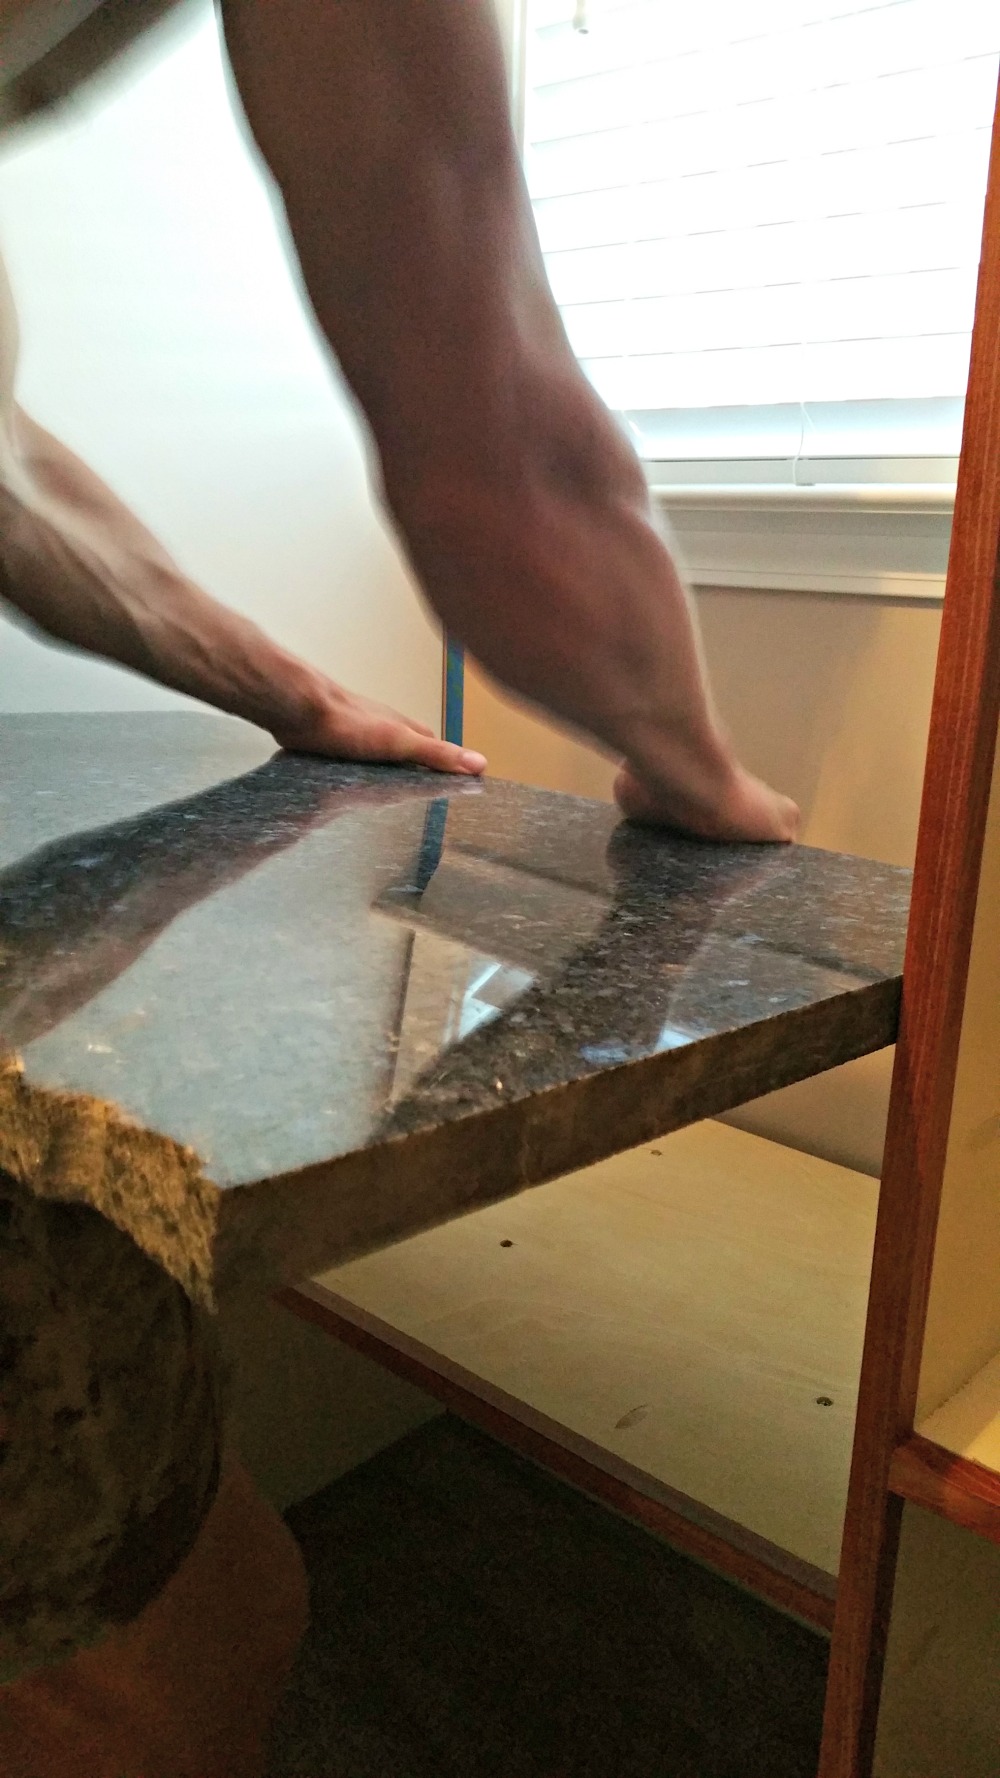
As for the bench itself, because granite is super heavy, we doubled up on all of our support. My hubby created an inset look with our plywood leftovers from the rest of the built ins, and then we glued the granite top on.
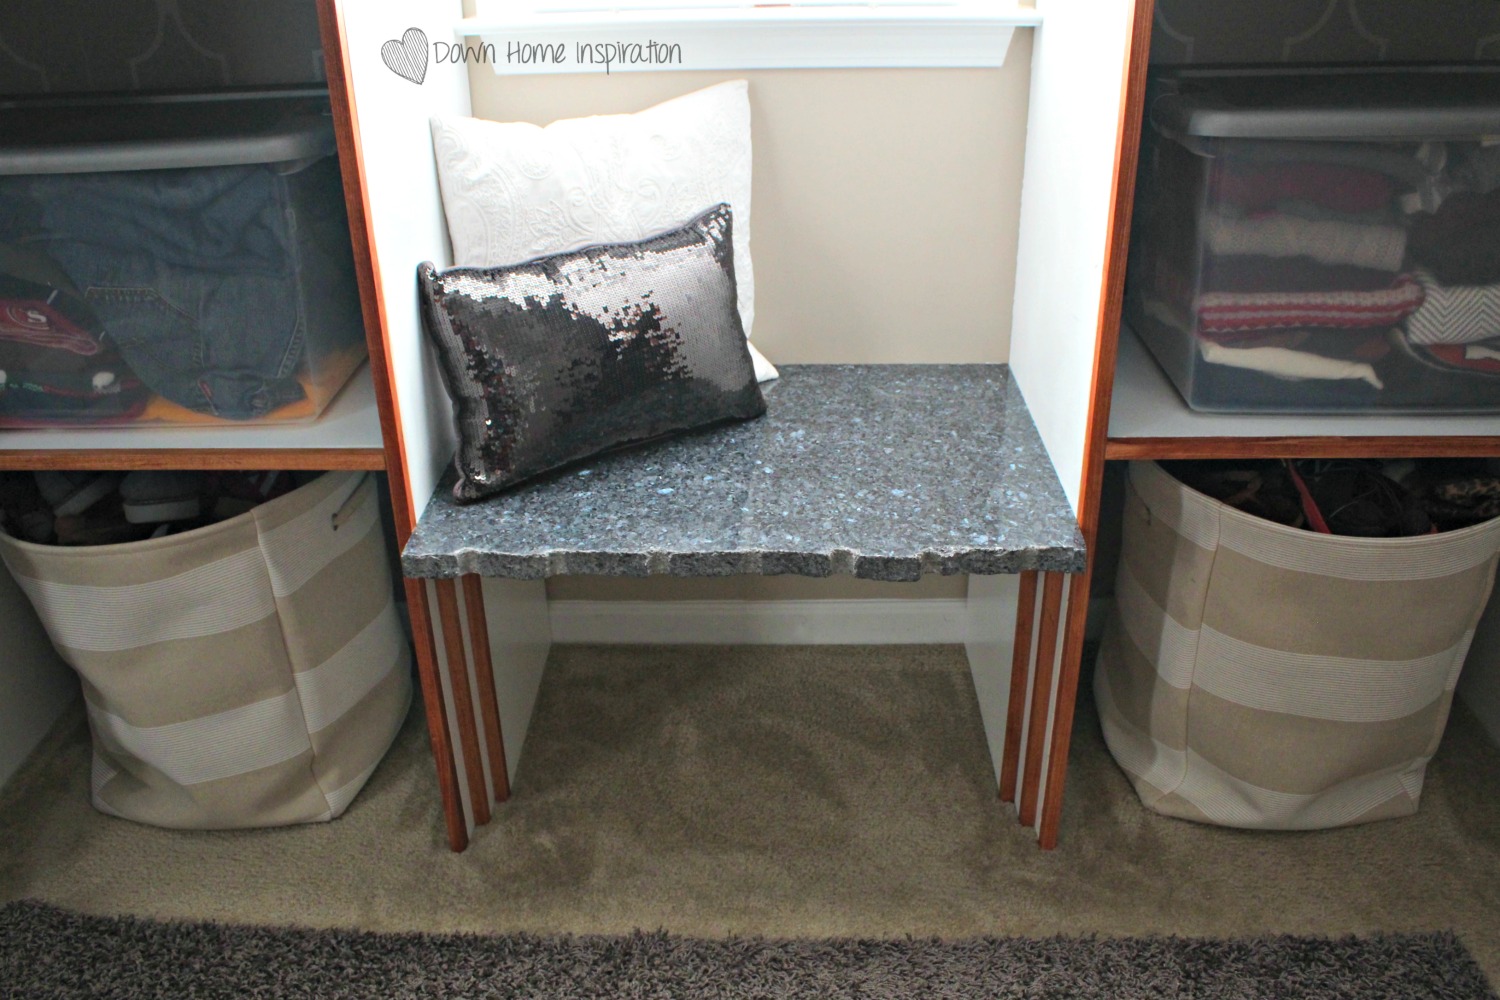
And now it looks like this! Oh, and did I mention it was totally free?!?! Yeah, I know I did, I just wanted to reiterate because we were so excited about it! Using the leftover plywood, 1x frame and paint that we had lying around after the other built ins were complete, this baby was a total freebie.
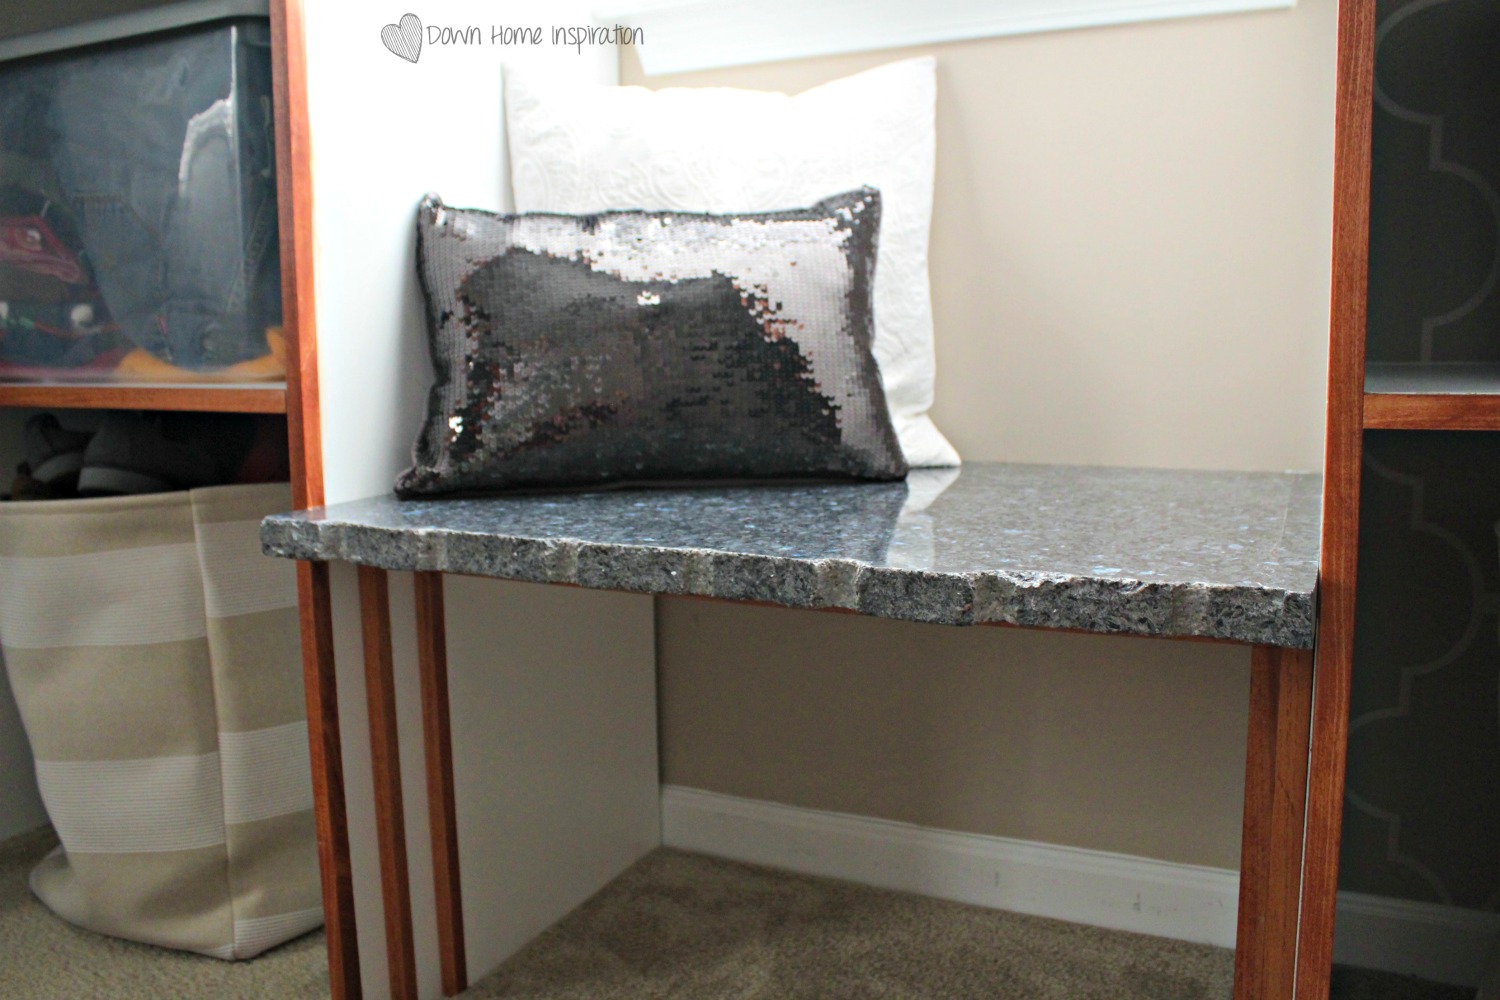
And now that it is in, I’m obsessed with the raw edge. It takes a very sophisticated space and adds a bit of funkiness. Love!


This is brilliant! I love the fact you got it free & were able to re-purpose it. I love doing projects like this. Enjoy x
Thanks so much, Jane!
I love the way it turned out and the edges look amazing. You all did an awesome job!
Thank you SO much Zawanda!
Such a clever idea. Glad if I’d try this. Looks awesome! Thanks for sharing this.
Cheers,
Oliver